> ## Documentation Index
> Fetch the complete documentation index at: https://terminal-docs.xendit.co/llms.txt
> Use this file to discover all available pages before exploring further.
# In-Person Payment Terminal
> Accept in-person payments through Xendit's payment terminals across Southeast Asia with a single API integration
## Overview
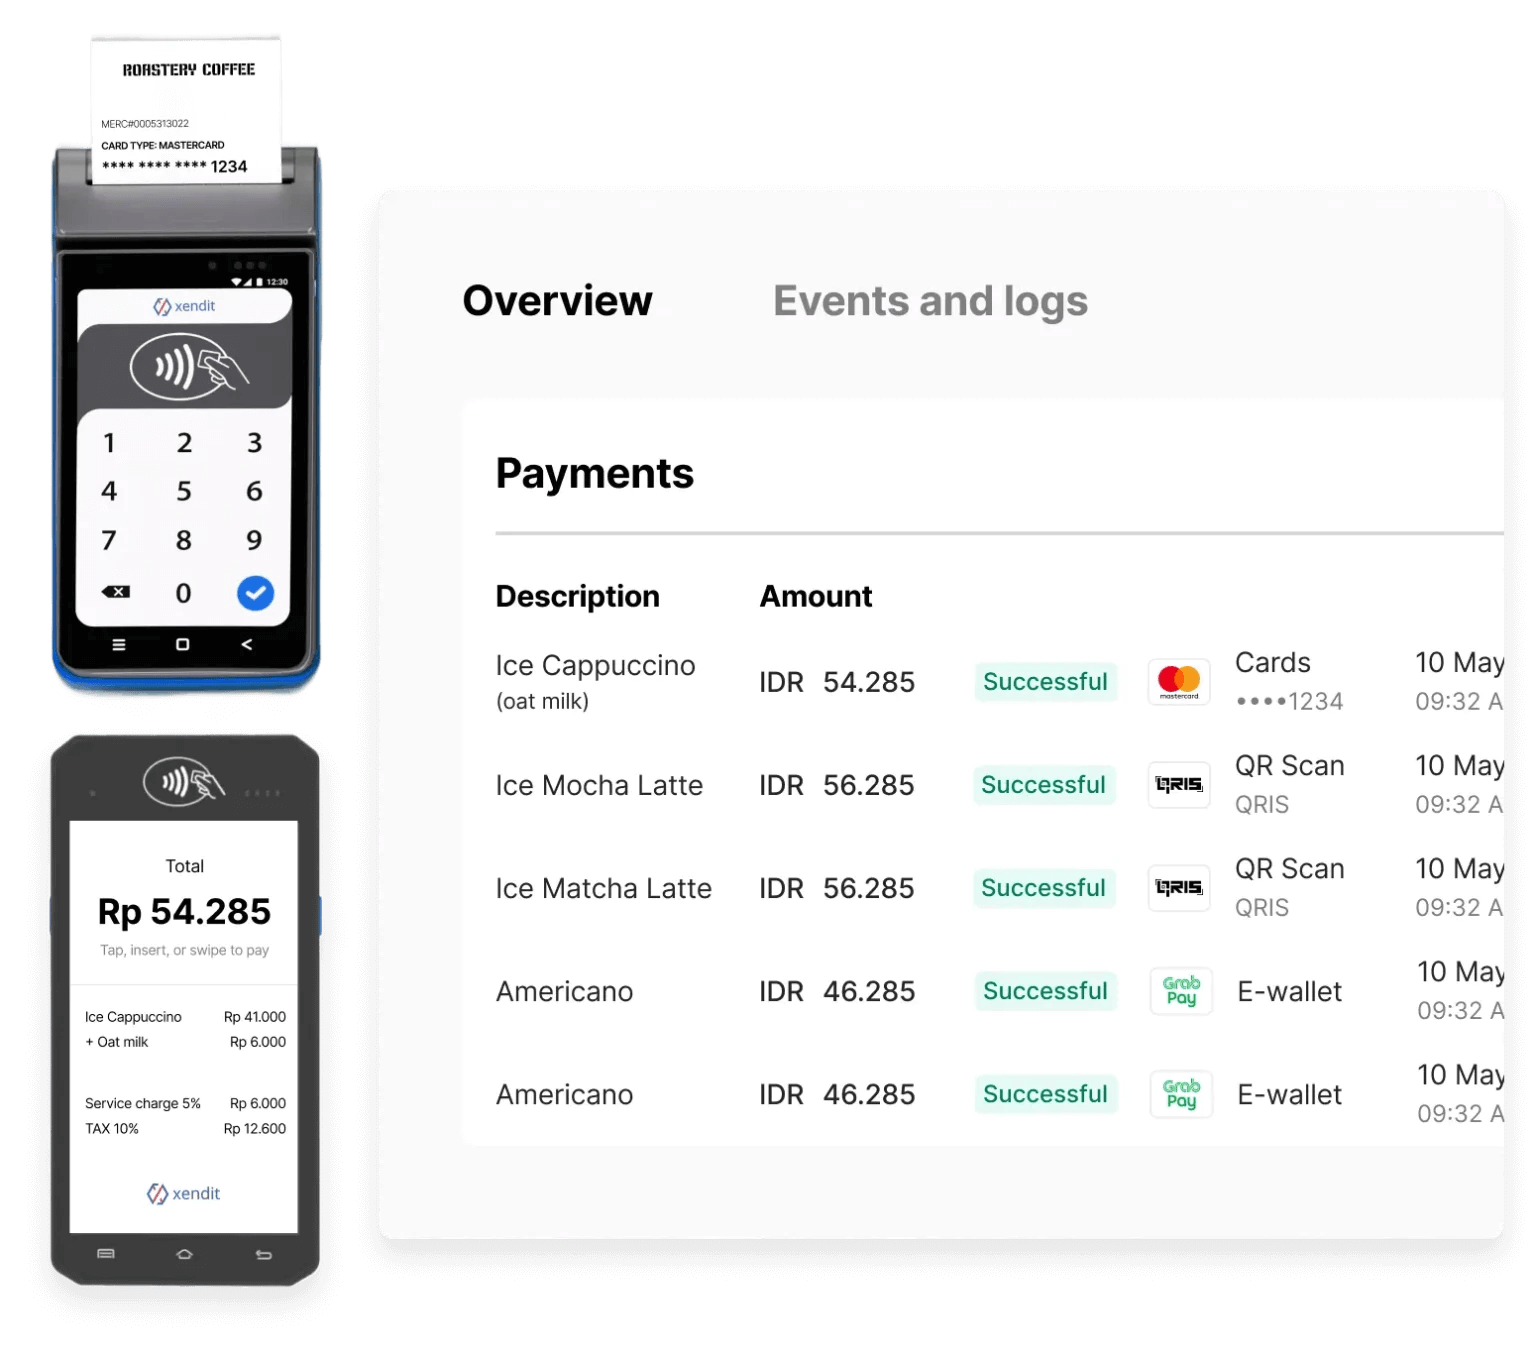 Xendit Payment Terminal enables businesses to accept in-person payments using Android payment terminals across Southeast Asia. Teams can process cards, QR, and selected wallet rails for staffed counters, kiosks, and ticketing flows.
Use one API contract to connect your POS, ticketing, or kiosk software in Indonesia, Thailand, Vietnam, and Malaysia, with upcoming support in the Philippines.
## Get Started
Choose the path that matches your rollout stage.
Request terminals, onboarding guidance, and market enablement support.
Set up your first terminal payment flow in less than 10 minutes.
## Choose Your Integration Path
Select the integration model that best fits your operations and engineering model.
Use the terminal directly with manual amount entry. API and SDK integration are not required.
Your backend calls Xendit's cloud HTTP API to create sessions and manage terminal operations centrally.
Your POS sends commands over the local network through the C2C API (HTTP) or C2C SDK (native methods).
## Why Teams Choose Xendit Terminal
* **Regional rollout with one integration**: Reuse the same API contract across supported Southeast Asia markets.
* **Broad payment acceptance**: Support cards, local debit schemes, and QR rails based on country availability.
* **Faster deployment**: Use streamlined onboarding and operational support to reduce go-live time.
* **Flexible operating model**: Choose device-only, H2H, or C2C based on checkout flow and device-control requirements.
## Coverage by Country
Current market status:
* **Live markets**: Indonesia, Thailand, Vietnam, Malaysia
* **Upcoming market**: Philippines
For complete channel-level coverage by country, including card brands, debit schemes, QR rails, and installment support, see the [Country Payment Coverage](/guides/getting-started/country-payment-coverage) guide.
## How Payments Flow
Most integrations follow this high-level sequence:
Your POS or backend creates a payment session and sends transaction amount and terminal details.
The terminal prompts the customer to tap, insert, swipe, or scan, and then processes authorization.
Your system receives payment updates through callbacks or webhooks and closes the transaction.
For detailed request/response flows, callbacks, and edge-case handling, see [Terminal API Concepts](/api-reference/terminal-api/concepts), [Terminal API (H2H) introduction](/api-reference/terminal-api/introduction), and [Terminal API (C2C) introduction](/api-reference/c2c/introduction).
## Settlement and Operations
Funds are settled into your **Xendit Balance** within **T+1 day** after settlement is completed on the terminal device.
Monitor in-person payments in the **Xendit Dashboard** alongside online transactions for unified reconciliation.
## Next Steps
Move from evaluation to production with this sequence:
Contact [inpersonpayments@xendit.co](mailto:inpersonpayments@xendit.co) to request terminals and onboarding support.
Follow the [quickstart guide](/guides/getting-started/quickstart) and validate your selected integration track.
Complete certification, deploy terminals, and monitor payments through dashboard reporting and callbacks.
Xendit Payment Terminal enables businesses to accept in-person payments using Android payment terminals across Southeast Asia. Teams can process cards, QR, and selected wallet rails for staffed counters, kiosks, and ticketing flows.
Use one API contract to connect your POS, ticketing, or kiosk software in Indonesia, Thailand, Vietnam, and Malaysia, with upcoming support in the Philippines.
## Get Started
Choose the path that matches your rollout stage.
Request terminals, onboarding guidance, and market enablement support.
Set up your first terminal payment flow in less than 10 minutes.
## Choose Your Integration Path
Select the integration model that best fits your operations and engineering model.
Use the terminal directly with manual amount entry. API and SDK integration are not required.
Your backend calls Xendit's cloud HTTP API to create sessions and manage terminal operations centrally.
Your POS sends commands over the local network through the C2C API (HTTP) or C2C SDK (native methods).
## Why Teams Choose Xendit Terminal
* **Regional rollout with one integration**: Reuse the same API contract across supported Southeast Asia markets.
* **Broad payment acceptance**: Support cards, local debit schemes, and QR rails based on country availability.
* **Faster deployment**: Use streamlined onboarding and operational support to reduce go-live time.
* **Flexible operating model**: Choose device-only, H2H, or C2C based on checkout flow and device-control requirements.
## Coverage by Country
Current market status:
* **Live markets**: Indonesia, Thailand, Vietnam, Malaysia
* **Upcoming market**: Philippines
For complete channel-level coverage by country, including card brands, debit schemes, QR rails, and installment support, see the [Country Payment Coverage](/guides/getting-started/country-payment-coverage) guide.
## How Payments Flow
Most integrations follow this high-level sequence:
Your POS or backend creates a payment session and sends transaction amount and terminal details.
The terminal prompts the customer to tap, insert, swipe, or scan, and then processes authorization.
Your system receives payment updates through callbacks or webhooks and closes the transaction.
For detailed request/response flows, callbacks, and edge-case handling, see [Terminal API Concepts](/api-reference/terminal-api/concepts), [Terminal API (H2H) introduction](/api-reference/terminal-api/introduction), and [Terminal API (C2C) introduction](/api-reference/c2c/introduction).
## Settlement and Operations
Funds are settled into your **Xendit Balance** within **T+1 day** after settlement is completed on the terminal device.
Monitor in-person payments in the **Xendit Dashboard** alongside online transactions for unified reconciliation.
## Next Steps
Move from evaluation to production with this sequence:
Contact [inpersonpayments@xendit.co](mailto:inpersonpayments@xendit.co) to request terminals and onboarding support.
Follow the [quickstart guide](/guides/getting-started/quickstart) and validate your selected integration track.
Complete certification, deploy terminals, and monitor payments through dashboard reporting and callbacks.